
Tutorials below are covering WebGPU-Dev release branch. If you plan to use this branch, please email us at info@vertexform3d.com to sign up for developer updates.
The Vertex Form 3D Unity repository is an all-in-one framework for building cross-platform, standalone virtual reality applications. The framework requires a set of API keys, easily obtained from third-party providers, such as Photon (multiplayer), and Cesium (geospatial data). All other components are configured directly within Unity and can be fully customized, branded, and deployed under your organization’s name.
Move on to the Installation step
Please visit the GitHub repository (WebGPU-Dev) and download the ZIP file to your desired location. We recommend using Unity version 6000.3.11f1 LTS and installing the framework on the D:\ drive or another hard drive. If you install it in a folder nested too deeply, you may see a warning that the file path is too long. Unzipping the project directly to the C: or D: drive will resolve this issue. You may see some errors, but they can be safely cleared as they won’t affect the project.
🌟 Don't forget to STAR this repository on GitHub! 🌟
To create a clean repository, make a new folder, name it Your App Name. Copy Assets, Packages, and User Settings folders into it.
Ensure the required platform modules are installed in Unity Hub. Go to Installs → Manage → Add Modules, and verify that Android, Windows, and Web modules are installed.
Open the project in Unity, and select desired platfrom. Vertex Form supports Android, Web, and Windows Desktops.
If the Project Validation window appears, select Fix All. Afterward, open the Console and clear any red error messages that are safe to resolve.
Move on to the next step: Exploring Project Structure
About the project structure
To explore available scenes, navigate to:
Assets → Vertex Form 3D → Scenes → Vertex Form 3D Scenes
In this folder, you’ll find the Core Scenes (Login, Home, and Addressable scenes), as well as Database Scenes, which are example environments including Hubs, Geospatial, and other scene types.
About the project structure
Core Scene Structure
These core scenes are required to be included in the Build Profiles, and must always be included in the build (you can customize them with your own).
In this folder, you will also find Database Scenes — example scenes organized into:
These scenes come with a variety of prebuilt assets and setups to help you get started quickly.
You are free to reuse, modify, or extract any game objects from these scenes for your own environments.
These scenes can be moved, added, removed, set to local or remote.
💡 As your app grows, you can switch these to Remote Addressables to reduce build size and optimize performance on devices like Meta Quest.
(This will be covered in a later step.)
After setting up your multiplayer token (next step):
👉 Always start testing from the Login Scene
This ensures:
(These systems will be explained in upcoming steps.)
Move on to the next step: Setting up Multiplayer Token
1. To successfully test the project, you'll need a multiplayer token from Photon. You can obtain one by creating a free account at Photon Dashboard. Click on Create a New App.
2. Select FUSION from dropdown. Select Non-Gaming App if you plan to use the framework to create apps for education, training, medical simulation, collaboration, metaverse etc. For gaming apps select "Multiplayer game". Click "create".
Select Fusion in the "Select Fusion SDK" slot
Select Fusion 2 (Recommended) in the Select SDK Version
3. Create a new app again, this time select "voice"
Note the location of API ID's from FUSION and Voice and head back to Unity.
In the Vertex Form 3D SDK, open Project Setup → Open Fusion App Settings. Copy and paste your Fusion and Voice App IDs into the corresponding fields.
Move on to the next step: Platform Selection and Testing
Open Vertex Form 3D SDK, navigate to Platform Selection, and choose the desired platform. If you select Desktop or Web, you can test the app in third-person mode without connecting a headset.
There is no need to switch platforms inside Build Settings for testing. The system will automatically allow testing with either Desktop, VR or Web controls based on the selected platform inside the Vertex Form 3D SDK.
To test the app in First or Third Person mode, select WebGPU or Desktop. With the WebGPU selection, you can choose different browsers for testing. This simulates mobile browser controls.
To start testing, navigate to the Login Scene, and press Play. You will be able to play in Third or First Person.
Make sure to add your Photon API keys. Without them, the app will not be able to connect or enter any scenes.
Move on to the next step: Testing for VR (scroll back up.)
It is recommended to test often to catch any potential issues early. There are two ways to test VR without building an .apk file: via the LINK cable, and via the Unity editor using XR Device Simulator.
ALWAYS START TESTING FROM THE LoginScene
TESTING USING XR DEVICE SIMULATOR
This method is very useful for testing without access to a VR device or for multiplayer testing—when running on a headset while simultaneously joining from the editor using XR Device Simulator.
Select VR as a platform from the Platform Selection.
Start the game. While the game is still in Play Mode, locate XR Device Simulator inside the Vertex Form 3D SDK and click on it. The XR Device Simulator will appear in the hierarchy and will remain there for the duration of the test.
You can use the WASD keys to move around and press Tab to switch between controlling the hands and the head. Do not use the mouse to rotate, as it will cause you to lose sight of your hands, use your head instead.
Use the XR Device Simulator panel to better understand the controls.
We've also added a convenient keyboard shortcut feature for UI access:
If your game pauses when switching scenes, go to the Console window and uncheck "Pause on Error." These are not actual errors but debug logs, and unchecking this option will prevent unnecessary interruptions while testing.
TESTING VIA THE LINK CABLE:
The cable included with your Meta Quest device is a charging cord, not the Link cable. To use the Link feature, you’ll need to purchase a compatible cable separately—either from the official Meta website or a more affordable alternative. After purchasing the link, follow these instruction to set it up. You may also consider enabling Air Link, though it has been found to be unstable.
To test the app via Unity using the link, you will have to open Rift Home. Open your headset, go to System - Link - Launch Link. It will open Rift Home. Get back to Unity and hit "Play." The game will start in your headset.
At this stage, you may be eager to start customizing your environment. Please be patient and complete a clean build before making any changes. A good practice is to duplicate the project after the clean setup is finished and use the copy for customization, so you can always return to a clean project if needed. Follow the instructions below to build and test a clean project. The goal is to ensure your app runs successfully on the headset as a standalone application.
Move on to the next step: Making first build and headset testing
ADDING AND BUILDING THE SCENES
A two-step process is required to add custom scenes into the app. Start by duplicating an existing example Scene or creating a brand-new Scene in the Scenes folder inside Assets. Remove default Main Camera.
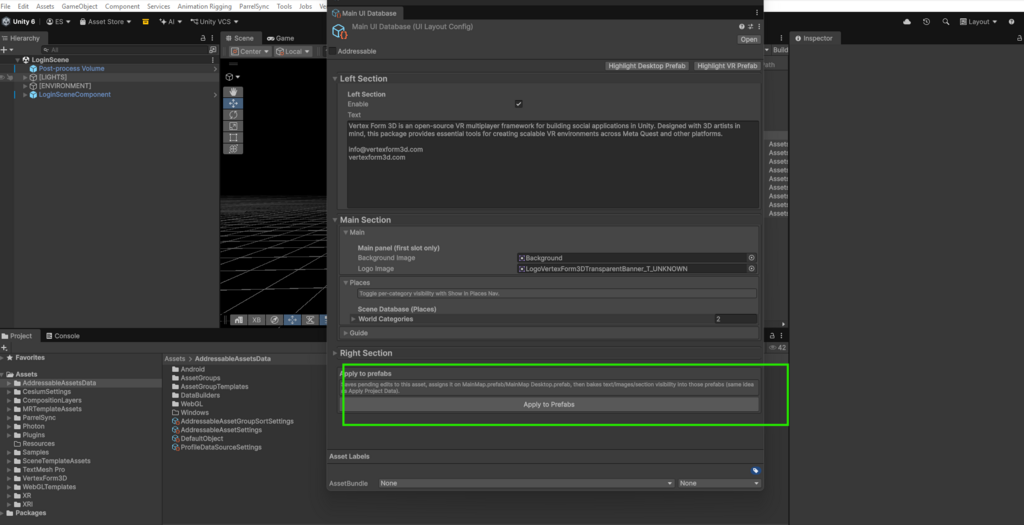
This step is necessary for scenes to appear in the Main UI. Open Vertex Form 3D SDK and Click on Main UI Database. Dock this window to the side of the Unity Editor so you can keep it open at all times.
By default, there are several categories: Hubs and Other. You can rename existing categories or add your own. You can create multiple scenes under a category. These categories are used in the UI, allowing users to sort and browse environments by category.
In the Main UI Database panel you can add a Category or a World withing the Category, by clicking on + to duplicate an entry. Rename it exactly as the new scene you just created. Replace the sprite (image) with a screenshot of the scene - this will show up in the Main UI as a scene preview. You can change the order of the scenes or remove the scenes from the Menu by clicking -.
In the Main UI at Runtime, your users will be able to sort these worlds from the sorting panel on top of the UI.
You can add a description of your world, as well as enable Fly Mode. You can also uncheck unsupported platforms. For example, if a large environment is only accessible in VR or Web, but not on Mobile - uncheck WebXR/Mobile, users will see a red arrow instead of the default one, indicating that the environment is not supported on their platform.
You can add a description of your app, along with your own logo and background, from the Main UI Database. Make sure to click "Apply to Prefab."
NOTE: Your images must be Sprites to be added to the database. To convert your .png or .jpg image into a sprite, select the image, go to the Inspector, and change the Texture Type from "Default" to "Sprite (2D and UI)." Additionally, set Sprite Mode to "Single" (not "Multiple"). To optimize performance, it is recommended to reduce the Max Size to 512 to minimize image file size.
Adding scenes to the Addressables Asset Group is a crucial step, ensuring they are included in the build. By default, the framework is set up for local delivery, meaning all scenes will be built directly into your final .apk file.
If you don’t see the Addressable Asset Group, navigate to:
Vertex Form 3D SDK → Build Addressables → Addressable Groups.
Drag and drop the new scene into the Addressable Group Window. Select the scene and rename it, keeping only the scene name.
In order for your scene to be recognized and delivered at Runtime, you need to assign lable group.
Return to the Testing step to verify that everything functions correctly and that the scene appears in the UI. You can also create a new build to confirm the app is properly set up and works as a standalone experience on the headset.
Move on to the next step Obtaining A Geospatial Token
BUILDING ADDRESSABLES AND .APK FILE
Building addressable asset bundles and the .apk file early is recommended to ensure the app functions properly before investing significant time in customizing environments. Scenes and assets can always be updated and rebuilt as needed.
By default, Addressables are built into the local folder, and the final .apk file will include these environments. Steps for Remote Addressables (cloud delivery) will be explained later.
The .apk file is the standard format for Android apps, and since Meta Quest runs on the Android platform, building an .apk file is required for deployment.
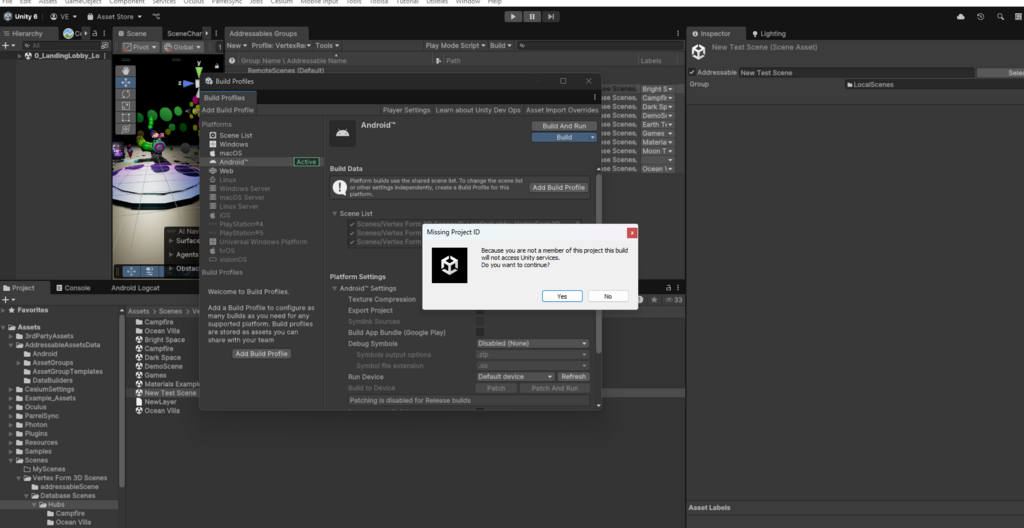
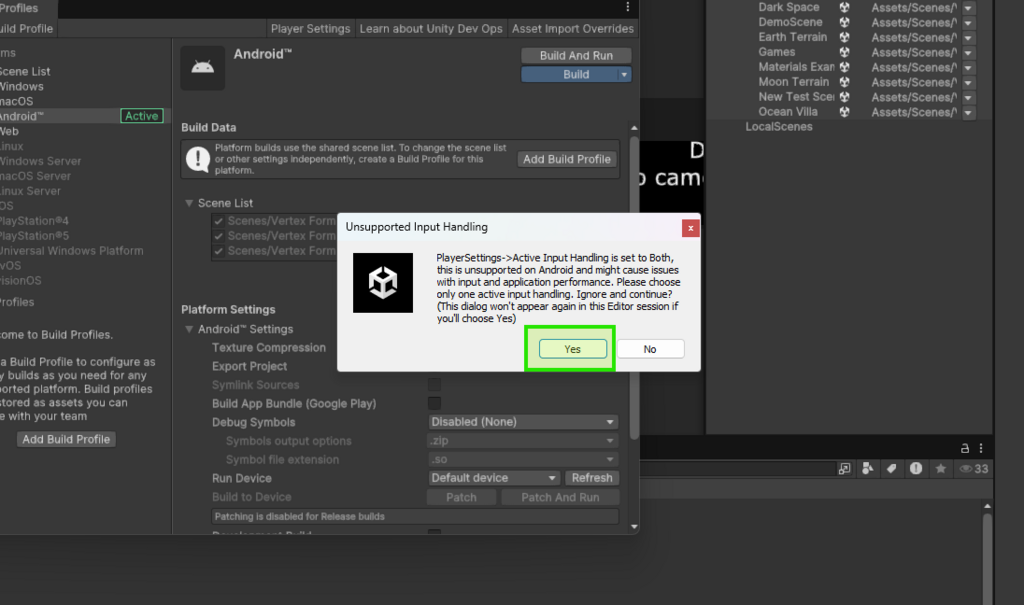
Open Build Settings:
Build the .apk:
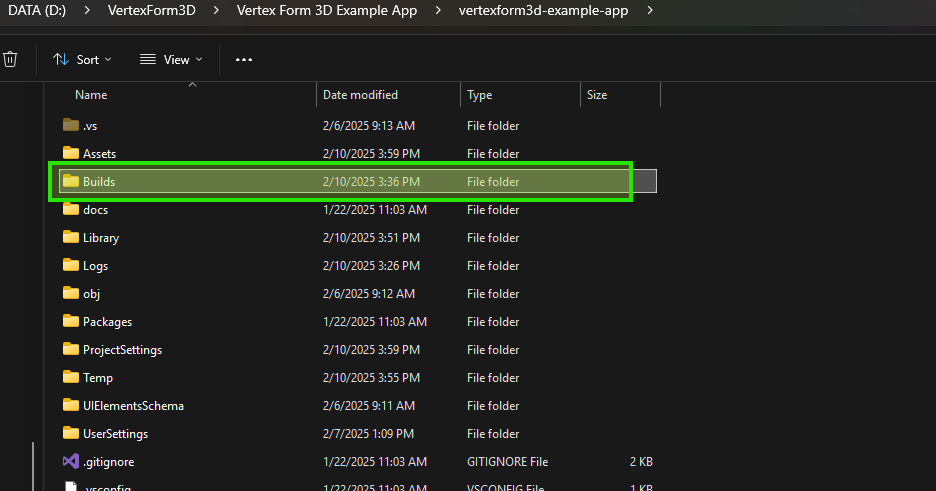
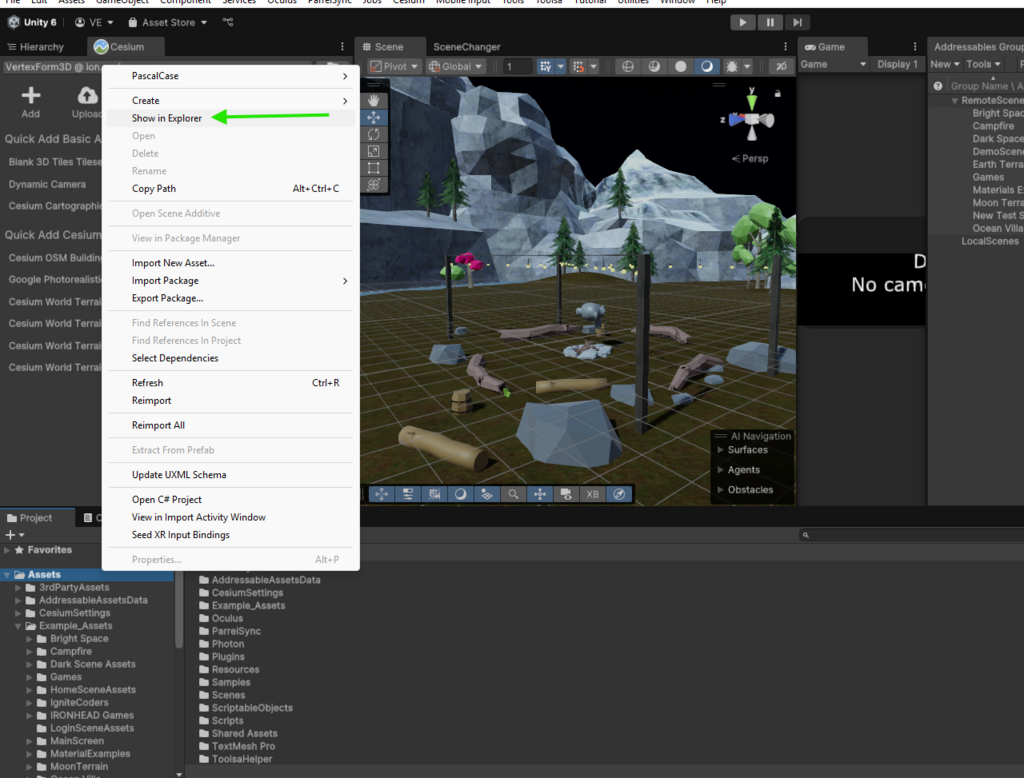
You can find your builds by right-clicking the asset folder and selecting Show in Explorer.
Upload your .apk to the headset. Install Meta Quest Developer Hub. Make sure your headset is connected via Link, then open File Manager → Apps and install your .apk using + Add Build.
Click on the three dots and press "Launch App" it should start playing in your headset.
After confirming that your app works as a standalone build, you can begin customization. Create a copy of the project or start a new branch in your own GitHub repository. If anything breaks during customization, you can always revert to the clean, working version.
Move on to the next step: Adding your own scenes
Publishing settings and keystore key
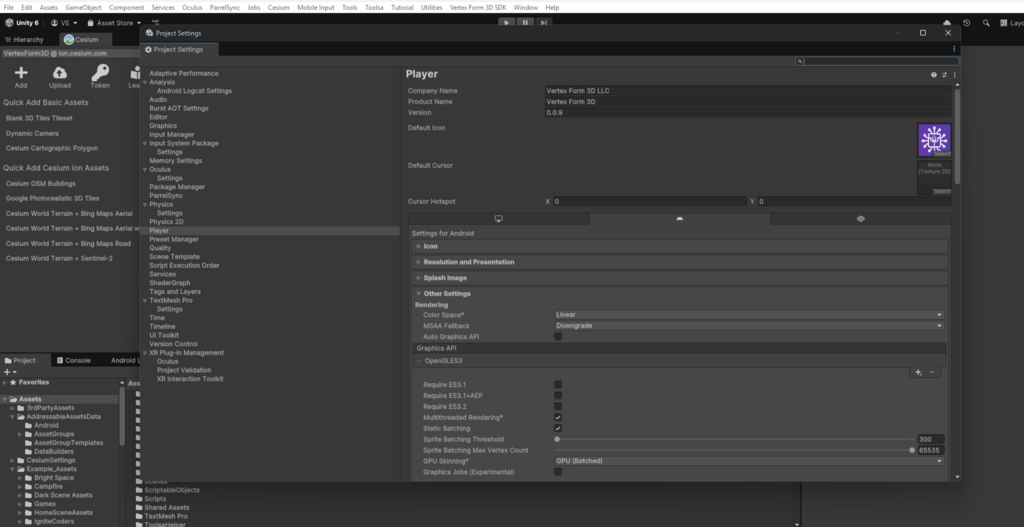
To make your app unique, you need to update the publishing settings. Navigate to Edit > Project Settings > Player, then modify the Company Name and Product Name. Set your product version to 0.0.1.
Scroll down to Identification and fill in the Package Name, Bundle Version, and Package Version. Each time you upload a new .apk to Meta Quest, increment the version number. Following Semantic Versioning is recommended for naming your builds.

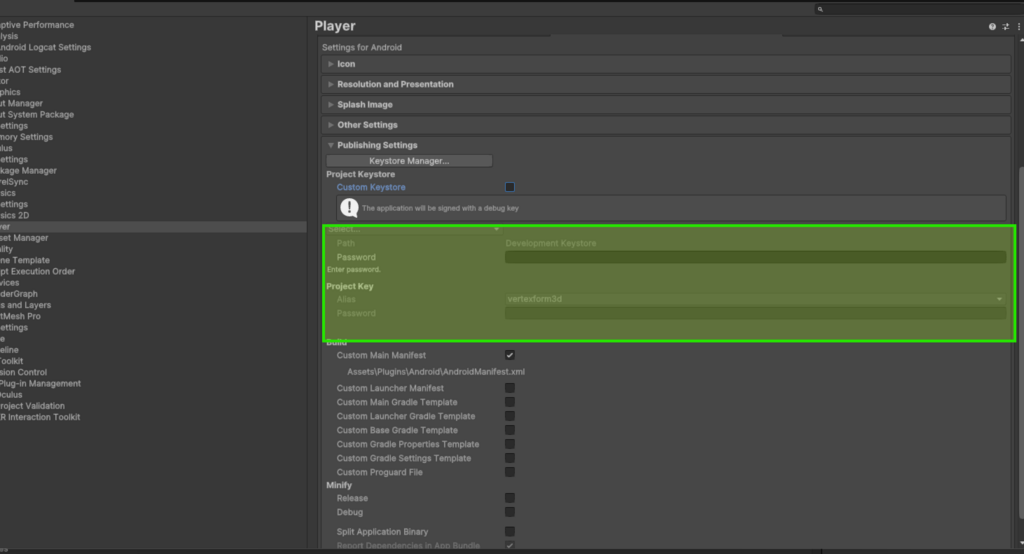
To successfully build your .apk file, you must either obtain a Keystore Manager key or UNCHECK "Custom Keystore" if you're only testing the .apk on your device.
You cannot upload an .apk to Meta Quest without this key.
Make sure to store the key in a secure location where you can always access it. Losing access to the key will prevent you from updating your app on Meta Quest. If you encounter the error "Unable to sign in", it's often due to an issue with the keystore.
If you need to create a key, follow the instructions in the "Custom Keystore" window.
Move on to the next step: Publishing on Meta quest
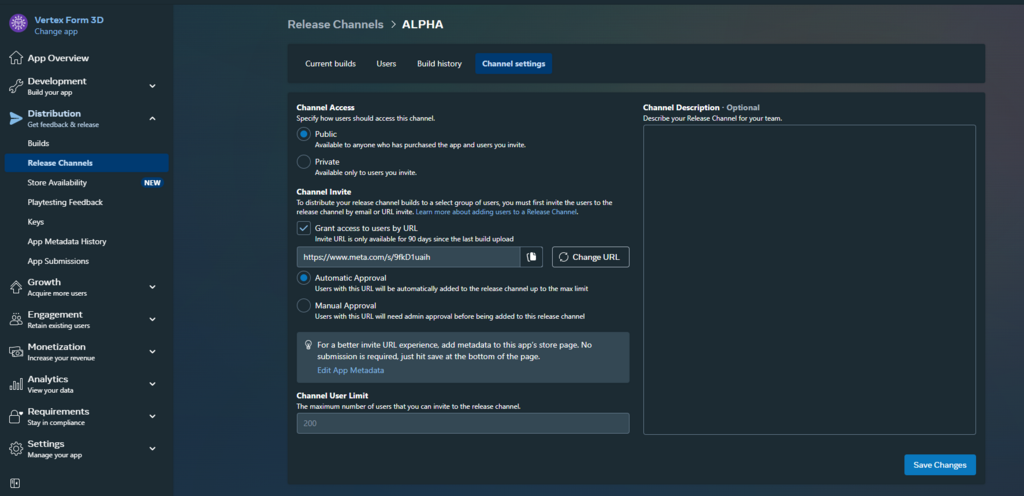
Publishing the alpha version of your app on Meta Quest is a simple and straightforward process that does not require approval. Your app will be accessible to others via an invite link.
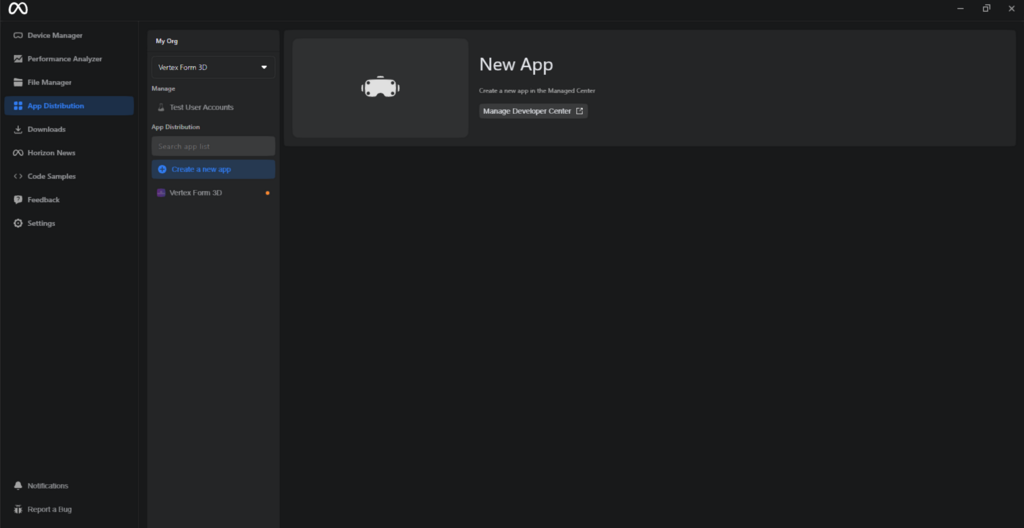
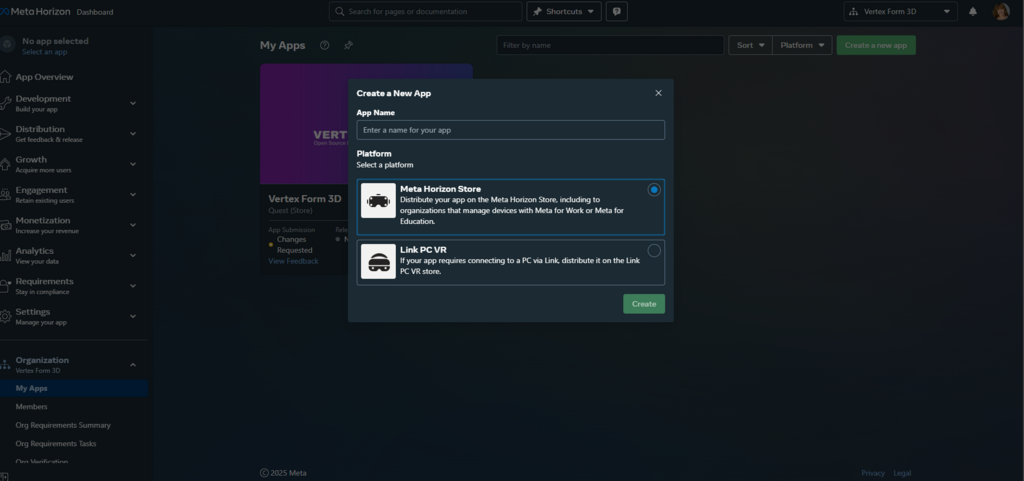
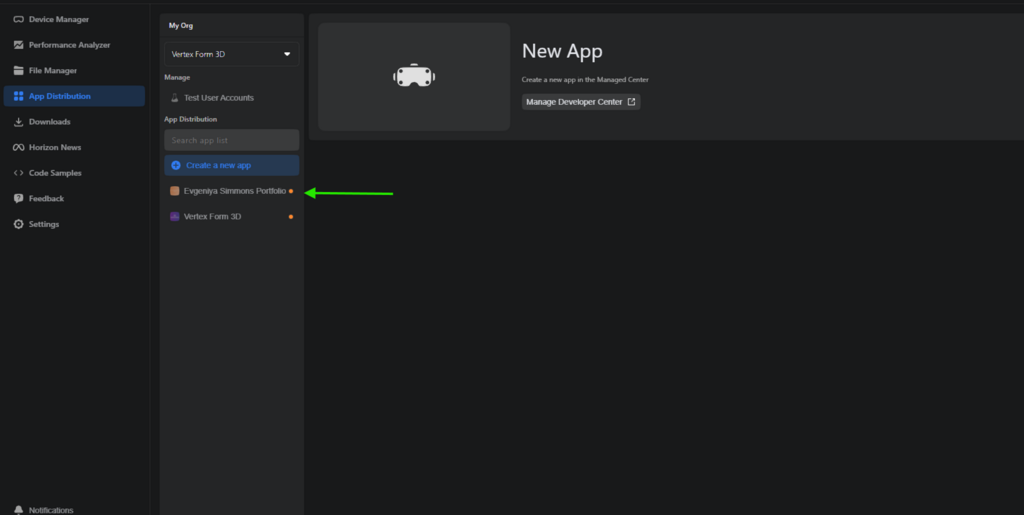
Install Meta Quest Developer Hub on your desktop and sign in with your Meta account. Navigate to App Distribution, then click Create a New App. Enter a name for your app, return to the Developer Hub, refresh the page, and your new app will appear.
Click on your newly created app and use the Upload button to upload the .apk file you created earlier. The system will analyze your app and provide feedback on its status, including any suggestions for fixes. Fix any issues, and try again.
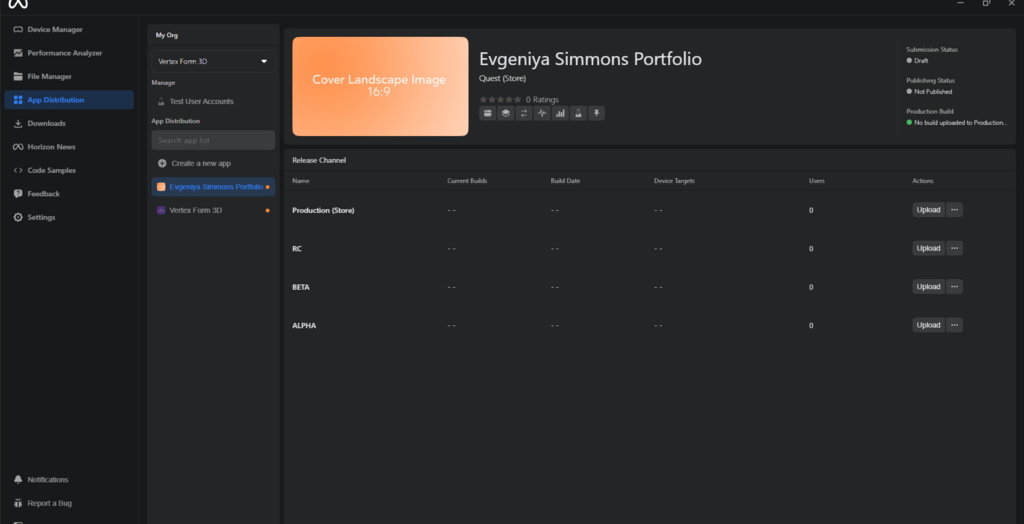
After successfully uploading your .apk file, you can update media assets such as the header image, logo, and other photos.
🎉 Huge congratulations on publishing your VR app! 🚀 You’ve turned your vision into reality—an incredible achievement. Keep pushing boundaries, inspiring others, and shaping the future of immersive experiences. The journey is just beginning! 🔥✨
Take a moment to celebrate and share your achievement with the community in the Community Showcase channel on Discord. 🎉